Microneedling is a popular skincare treatment known for its ability to rejuvenate the skin and promote a more youthful appearance. However, one common concern that many people have after undergoing this procedure is how to remove dead skin after microneedling. In this article, you will discover effective and safe methods to gently eliminate dead skin cells after microneedling, leaving your skin fresh, radiant, and ready to glow. So, if you’re looking for ways to optimize the results of your microneedling treatment, keep reading to find out how to effectively remove dead skin and achieve the flawless complexion you desire.
How To Remove Dead Skin After Microneedling
1.1 Using a mild exfoliating scrub
Exfoliating the skin is an essential step in any skincare routine. It helps to remove dead skin cells and reveal a fresh, glowing complexion. One of the easiest ways to exfoliate your skin is by using a mild exfoliating scrub. These scrubs typically contain small particles that gently buff away dead skin cells when massaged onto the skin. When choosing a scrub, look for one with natural ingredients and avoid harsh abrasives that can damage the skin.
To use a mild exfoliating scrub, start by wetting your face with warm water. Then, take a small amount of the scrub and gently massage it onto your skin using circular motions. Pay extra attention to areas that are prone to dryness or buildup, such as the forehead, nose, and chin. After a minute or two of gentle scrubbing, rinse off the scrub with lukewarm water and pat your face dry with a clean towel. Remember to follow up with a moisturizer to keep your skin hydrated and protected.
1.2 Applying a chemical exfoliant
If you prefer a more targeted approach to exfoliation, consider incorporating a chemical exfoliant into your skincare routine. Chemical exfoliants contain ingredients like alpha hydroxy acids (AHAs) or beta hydroxy acids (BHAs) that work to dissolve dead skin cells and promote skin cell turnover. These exfoliants can help with a variety of skincare concerns, including acne, uneven skin tone, and fine lines.
To use a chemical exfoliant, start by cleansing your face with a gentle cleanser to remove any dirt or makeup. Then, apply a small amount of the exfoliant to a cotton pad or your fingertips and gently swipe it across your face, avoiding the eye area. Allow the exfoliant to sit on your skin for the recommended amount of time (check the product instructions), and then rinse it off with water. Remember to follow up with a moisturizer and sunscreen, as chemical exfoliants can make your skin more sensitive to the sun.
1.3 Using a gentle exfoliating brush
For a deeper exfoliation, consider using a gentle exfoliating brush. These brushes, often made with soft bristles, help to physically exfoliate the skin by removing dead skin cells and promoting blood circulation. Using an exfoliating brush can also help to unclog pores and prevent breakouts.
To use a gentle exfoliating brush, start by wetting your face with warm water and applying a mild cleanser. Wet the brush and gently massage it onto your skin using circular motions. Avoid applying too much pressure, as this can irritate the skin. Focus on areas that need extra attention, such as the nose and chin, but be gentle on sensitive areas like the cheeks. After exfoliating, rinse off the cleanser and pat your face dry. Follow up with a moisturizer to keep your skin hydrated.
1.4 Trying a natural exfoliating remedy
If you prefer a more natural approach to exfoliation, there are many ingredients from your kitchen that can be used as gentle exfoliators. For example, baking soda mixed with water can create a paste that can be massaged onto the skin to remove dead skin cells. Coffee grounds can also be mixed with a carrier oil, such as coconut or olive oil, to create a gentle scrub. Other natural exfoliators include sugar, oatmeal, and honey.
To create a natural exfoliating remedy, start by mixing the chosen ingredient with a small amount of water or a carrier oil to create a paste or scrub-like consistency. Apply the mixture to your face and gently massage it onto your skin using circular motions. Rinse off the mixture with warm water and pat your face dry. Remember to moisturize your skin afterward to keep it hydrated.
Moisturizing the Skin
2.1 Applying a hydrating moisturizer
After exfoliating, it is important to replenish your skin’s moisture barrier to keep it hydrated and healthy. One of the simplest ways to moisturize your skin is by applying a hydrating moisturizer. Look for a moisturizer that suits your skin type and contains ingredients like hyaluronic acid, glycerin, or ceramides, which help to lock in moisture.
To apply a hydrating moisturizer, start by cleansing your face with a gentle cleanser to remove any dirt or residue. Then, take a small amount of the moisturizer and massage it onto your face using upward, circular motions. Pay extra attention to dry areas or areas that need extra hydration, such as the cheeks or forehead. Allow the moisturizer to fully absorb into your skin before applying any other products or makeup.
2.2 Using a moisturizing mask
In addition to using a moisturizer, incorporating a moisturizing mask into your skincare routine can provide an extra boost of hydration. Moisturizing masks are formulated with ingredients that penetrate deeply into the skin, leaving it feeling soft, supple, and nourished. They can be used once or twice a week, or as needed, to give your skin an added hydration boost.
To use a moisturizing mask, start by cleansing your face with a gentle cleanser. Then, apply a thin, even layer of the mask to your face, avoiding the eye and lip areas. Allow the mask to sit on your skin for the recommended amount of time (check the product instructions), and then rinse it off with lukewarm water. Gently pat your face dry with a clean towel and follow up with your regular moisturizer to seal in the moisture.
2.3 Applying natural moisturizing ingredients
If you prefer a more natural approach to moisturizing your skin, there are several ingredients that you can use to hydrate and nourish your skin. For example, aloe vera gel, known for its soothing properties, can be applied to the skin as a moisturizer. Jojoba oil, which closely resembles the skin’s natural sebum, can also be used as a moisturizer.
To apply natural moisturizing ingredients, start by cleansing your face with a gentle cleanser. Then, take a small amount of the chosen ingredient (such as aloe vera gel or jojoba oil) and massage it onto your face using gentle, upward motions. Allow the ingredient to absorb into your skin before applying any other products. Remember to patch test any new ingredient before applying it to your entire face to check for any potential allergies or skin reactions.
2.4 Utilizing oils for hydration
Another way to moisturize your skin is by using facial oils. Facial oils are known for their ability to deeply hydrate and nourish the skin, leaving it looking plump and radiant. There are various facial oils available, including rosehip oil, argan oil, and grapeseed oil, each with its own unique benefits for the skin.
To utilize oils for hydration, start by cleansing your face with a gentle cleanser and allowing your skin to dry partially. Then, take a few drops of your chosen facial oil and warm it up between your palms. Gently press the oil onto your face, focusing on any dry areas or areas that need extra hydration. Avoid applying too much oil, as a little goes a long way. Allow the oil to absorb into your skin before applying any other products or makeup.
Massaging the Skin
3.1 Using a gentle facial massage technique
Massaging your skin is not only relaxing but can also improve circulation and promote a healthy glow. Using a gentle facial massage technique can help to relieve tension, reduce puffiness, and improve the absorption of skincare products. When massaging your face, always start with clean hands and a clean face.
To perform a gentle facial massage, start by warming up your hands by rubbing them together. Then, using your fingertips, start massaging your forehead in circular motions, moving from the center of your forehead outward. Next, move on to your temples and gently massage in circular motions. Continue massaging your face, including your cheeks, jawline, and neck, using upward and outward strokes. Take your time and be gentle, making sure not to tug or pull on your skin. Finish the massage by applying a moisturizer to lock in hydration.
3.2 Incorporating lymphatic drainage massage
Lymphatic drainage massage is a technique that aims to stimulate the lymphatic system, which plays a crucial role in removing waste products from the body. By incorporating lymphatic drainage massage into your skincare routine, you can help to reduce puffiness, improve circulation, and promote a healthy complexion.
To perform lymphatic drainage massage, start by cleansing your face with a gentle cleanser. Apply a small amount of facial oil or moisturizer to your fingertips to create a slippery surface. Then, using gentle sweeping motions, start at the center of your face and move outward towards your ears, following the natural pathways of your lymphatic system. Repeat this motion several times, gradually moving down your neck and chest. Take your time and be gentle, allowing the lymphatic system to flush out toxins and excess fluid.
3.3 Trying a vibrating facial massager
For those looking for a more advanced option, a vibrating facial massager can be a great tool to incorporate into your skincare routine. These devices use vibrations to stimulate blood circulation, relax facial muscles, and improve the absorption of skincare products. Vibrating facial massagers come in various forms, including handheld devices and rollerballs.
To use a vibrating facial massager, start by applying a small amount of moisturizer or facial oil to your face. Then, turn on the device and gently glide it over your face using upward and outward motions. Pay extra attention to areas that need extra care, such as the jawline and forehead. Take your time and enjoy the relaxing sensation of the vibrations. After massaging, gently pat any remaining product into your skin and follow up with a moisturizer to seal in the benefits.
Using a Facial Steamer
4.1 Preparing the facial steamer
A facial steamer is a device that emits steam to open up pores and hydrate the skin. Using a facial steamer can help to loosen dirt and impurities, making it easier to cleanse and exfoliate the skin. Before using a facial steamer, it is important to prepare it properly.
To prepare a facial steamer, start by filling the water reservoir with distilled water, following the manufacturer’s instructions. Plug in the device and allow it to heat the water until steam is produced. Position yourself comfortably in front of the steamer, making sure to maintain a safe distance to prevent burning your skin. It is also a good idea to tie back your hair and remove any makeup or skincare products from your face before using the steamer.
4.2 Directing steam onto the treated areas
Once the facial steamer is ready, you can begin directing the steam onto the areas of your skin that you want to treat. The steam will help to open up your pores and prepare your skin for further treatments, such as exfoliation or extraction. It is important to be cautious during this step to prevent any burns or discomfort.
To direct steam onto the treated areas, position your face about 6-8 inches away from the steamer. Close your eyes to protect them from any direct contact with the steam. Allow the steam to envelop your face for about 5-10 minutes, or as recommended by the steamer’s instructions. Take deep breaths to relax and enjoy the soothing sensation of the steam. If at any point the steam feels too hot or uncomfortable, move your face further away or reduce the amount of time spent in front of the steamer.
4.3 Following with gentle exfoliation
After steaming your face, the next step is to follow up with gentle exfoliation. The steam will have helped to soften your skin and open up your pores, making it easier to remove dead skin cells and unclog pores. However, it is important to be gentle and avoid over-exfoliating, as this can irritate the skin.
To gently exfoliate your skin after steaming, choose a mild scrub or exfoliating brush. Apply a small amount of the scrub or cleanse your brush and gently massage it onto your skin using circular motions. Pay extra attention to areas that are prone to buildup, such as the nose and chin. Be careful not to apply too much pressure or scrub for too long, as this can cause redness or sensitivity. Rinse off the scrub with lukewarm water and pat your face dry.
4.4 Moisturizing after steaming
After exfoliating your skin, it is important to replenish moisture by applying a hydrating moisturizer. The steam from the facial steamer may have temporarily increased your skin’s moisture levels, but it is essential to lock in that hydration to keep your skin supple and nourished.
To moisturize your skin after steaming, choose a hydrating moisturizer that suits your skin type. Apply a small amount to your fingertips and gently massage it onto your face using upward and outward motions. Pay extra attention to dry areas or areas that need extra hydration. Allow the moisturizer to fully absorb into your skin before applying any other products or makeup.
Applying a Sheet Mask
5.1 Choosing a suitable sheet mask
Sheet masks have gained popularity in recent years for their convenience and effectiveness in delivering concentrated skincare ingredients to the skin. When selecting a sheet mask, consider your skin’s needs and choose one that targets your specific concerns. Sheet masks come in various formulations, including hydrating, brightening, soothing, and anti-aging.
To choose a suitable sheet mask, read the product description and look for ingredients that address your specific skincare needs. For example, masks with hyaluronic acid are great for hydration, while masks with vitamin C can help brighten the skin. It is also important to consider your skin type and any potential sensitivities or allergies before using a sheet mask.
5.2 Placing the sheet mask on the face
Once you have chosen a sheet mask, it is time to apply it to your face. Sheet masks are typically made of cotton or other soft materials that are soaked in a serum or essence. They are designed to fit the contours of your face and provide even coverage for maximum absorption of the skincare ingredients.
To apply a sheet mask, start by cleansing your face with a gentle cleanser. Carefully remove the mask from its packaging and unfold it. Align the cutouts on the mask with your eyes, nose, and mouth, and gently press the mask onto your face, smoothing out any wrinkles or air bubbles. Make sure the mask adheres well to your skin for optimal contact and absorption of the serum. Relax and leave the mask on for the recommended time (usually 15-20 minutes) as instructed on the packaging.
5.3 Leaving it on for the recommended time
Once the sheet mask is applied to your face, it is important to leave it on for the recommended time to allow the serum or essence to penetrate your skin. The sheet mask is designed to provide a prolonged period of hydration and nourishment, so taking it off too soon may limit its benefits.
To make the most of your sheet mask, find a quiet and comfortable place to relax while wearing it. You can lie down, read a book, or simply close your eyes and enjoy some downtime. The recommended time for leaving on a sheet mask is typically 15-20 minutes, but be sure to check the instructions on the packaging for specific guidelines. Avoid touching or adjusting the mask during this time to prevent any disruption to the serum absorption.
5.4 Removing the mask and moisturizing
After the recommended time has passed, it is time to remove the sheet mask and complete your skincare routine. Removing the mask is a straightforward process, but it is important to do it gently to avoid any irritation to your skin.
To remove the sheet mask, start by peeling it off from the edges, slowly working your way toward the center. Be careful not to pull or tug on your skin, as this can cause redness or sensitivity. Once the mask is off, gently pat any remaining serum or essence into your skin, allowing it to fully absorb. Follow up with your regular moisturizer to seal in the hydration and complete your skincare routine.
Using a Soft Washcloth
6.1 Wetting a soft washcloth with warm water
Using a soft washcloth is another gentle and effective method of removing dead skin cells and promoting a healthy complexion. When using a washcloth, it is important to ensure that it is clean, soft, and made from a gentle material to avoid any irritation or damage to the skin.
To use a soft washcloth, start by wetting it with warm water. The warm water will help to soften your skin and make it easier to remove dead skin cells. Make sure the water is comfortably warm, not too hot or too cold. Wring out any excess water from the washcloth to prevent dripping.
6.2 Gently patting the skin to soften dead skin cells
After wetting the washcloth, it is important to gently pat your skin to further soften dead skin cells. This step helps to loosen the dead skin cells and makes them easier to remove during the exfoliation process. Be sure to use light pressure and be gentle, avoiding any harsh rubbing or scrubbing.
To pat your skin, place the damp washcloth onto your face and lightly press it against your skin. Pay extra attention to areas that are prone to dryness or buildup, such as the forehead, nose, and chin. Hold the washcloth against your skin for a few seconds, allowing the warmth and moisture to penetrate. Repeat this step a few times, ensuring that your entire face is covered.
6.3 Wiping the skin with the washcloth
Once your skin has been lightly patted with the washcloth to soften dead skin cells, it is time to gently wipe the skin to remove the loosened cells and impurities. It is important to be gentle during this step to avoid any irritation or damage to the skin.
To wipe your skin with the washcloth, use light, circular motions, starting from the center of your face and moving outward. Pay extra attention to areas that are prone to dryness or buildup. Be sure to avoid applying too much pressure or scrubbing too aggressively, as this can lead to redness or sensitivity. Rinse out the washcloth as needed and continue wiping until your entire face feels clean and refreshed.
6.4 Repeating the process as necessary
Depending on your skin’s needs, you may need to repeat the process of using a soft washcloth to remove dead skin cells. If you feel like there is still residue or dry skin on your face after the first round, you can repeat the steps of wetting the washcloth, gently patting the skin to soften dead skin cells, and wiping the skin to remove the loosened cells.
It is important to listen to your skin and not overdo the exfoliation process. If your skin starts to feel sensitive or irritated, take a break and allow it to recover. Over-exfoliating can disrupt the skin’s natural barrier and lead to dryness or redness. It is generally recommended to exfoliate with a soft washcloth once or twice a week, or as needed, depending on your skin’s sensitivity and tolerance.
>> Read more: stomach laser hair removal
Trying a Chemical Peel
7.1 Consulting with a dermatologist
Before attempting a chemical peel, it is recommended to consult with a dermatologist to determine if it is suitable for your skin type and concerns. A dermatologist can evaluate your skin and provide professional advice on the appropriate type of chemical peel and its potential benefits.
During the consultation, be prepared to discuss your skincare concerns, medical history, and any medications you are currently taking. This information will help the dermatologist assess your skin’s suitability for a chemical peel and determine the best approach for your specific needs. It is important to be honest and transparent during the consultation to ensure the best possible outcome.
7.2 Choosing the appropriate type of chemical peel
There are various types of chemical peels available, each with its own specific ingredients and benefits for the skin. To choose the appropriate type of chemical peel, it is important to consider your skin type, concerns, and the desired outcome.
For mild exfoliation and brightening, a superficial peel, such as a glycolic acid or lactic acid peel, may be suitable. These peels gently remove dead skin cells and promote a more youthful complexion. For deeper exfoliation and targeting specific concerns, a medium or deep peel, such as a salicylic acid or trichloroacetic acid peel, may be recommended. These peels can improve the appearance of acne scars, wrinkles, and hyperpigmentation.
7.3 Following the instructions for application
Once you have chosen the appropriate type of chemical peel, it is essential to carefully follow the instructions for application. Chemical peels involve applying a solution to the skin that will exfoliate and rejuvenate the skin. The instructions will guide you on how to prepare your skin, apply the peel, and the duration of the treatment.
Before applying a chemical peel, it is important to cleanse your face thoroughly to remove any dirt, oil, or makeup. Follow the instructions to mix or prepare the peel solution according to the provided guidelines. Apply the solution to your face using a brush or cotton pad, avoiding the eye and lip areas. Leave the peel on for the recommended amount of time, and then neutralize or rinse it off as instructed.
7.4 Caring for the skin after the peel
After undergoing a chemical peel, it is essential to follow the aftercare instructions provided by your dermatologist. Chemical peels can temporarily make your skin more sensitive and increase the risk of sunburn, so it is important to take precautions to protect and nourish your skin.
Common aftercare instructions may include avoiding direct sun exposure, using a broad-spectrum sunscreen, avoiding harsh skincare products, and applying a soothing moisturizer. It is important to keep your skin hydrated and protected during the healing process. Follow any specific instructions provided by your dermatologist and monitor your skin for any signs of irritation or adverse reactions. If you have any concerns or questions, reach out to your dermatologist for guidance.
Utilizing a Clay Mask
8.1 Selecting a suitable clay mask for the skin
Clay masks are known for their ability to draw out impurities, absorb excess oil, and tighten the skin. When selecting a clay mask, it is important to consider your skin type and specific concerns to choose the most suitable option.
For oily or acne-prone skin, look for a clay mask that contains ingredients like kaolin clay or bentonite clay, which can help to control oiliness and minimize the appearance of pores. For dry or sensitive skin, opt for a milder clay mask that contains hydrating ingredients like aloe vera or chamomile. It is important to avoid clay masks that contain potential irritants or allergens if you have sensitive skin.
8.2 Applying the mask evenly
Once you have chosen a suitable clay mask, it is time to apply it evenly to your face. Applying the mask evenly ensures that all areas of your skin receive the benefits of the mask and helps to prevent uneven drying or irritation.
To apply a clay mask, start by cleansing your face thoroughly to remove any dirt, oil, or makeup. Use clean hands or a clean brush to scoop out an appropriate amount of the mask and apply it to your face. Start from the center of your face and work your way outward, using gentle strokes to evenly distribute the mask. Avoid the eye and lip areas, as clay masks can be drying and may cause irritation in these sensitive areas.
8.3 Allowing the mask to dry
After applying the clay mask, it is important to allow it to dry completely before removing it. The drying process helps the mask to harden and draw out impurities from the skin.
The recommended drying time may vary depending on the specific clay mask and its ingredients. Follow the instructions provided on the packaging to determine the appropriate drying time. During this period, you may experience a tightening sensation as the mask dries, which is normal. Take this opportunity to relax and enjoy a few moments of self-care.
8.4 Removing the mask and moisturizing
Once the clay mask has dried completely, it is time to remove it. Removing the mask should be done gently to avoid any irritation or damage to the skin.
To remove the clay mask, start by moistening your face with warm water. Use your fingertips or a soft washcloth to gently massage the mask in circular motions, gradually loosening it from your skin. Rinse your face with lukewarm water, making sure to remove all traces of the mask. Pat your skin dry with a clean towel and immediately follow up with a moisturizer to replenish hydration and restore balance to your skin.
Opting for Professional Dermabrasion
9.1 Consulting with a dermatologist
Professional dermabrasion is a dermatological procedure that involves mechanically exfoliating the skin to improve its texture and appearance. Before undergoing dermabrasion, it is crucial to consult with a dermatologist to determine if you are a suitable candidate for the treatment.
During the consultation, your dermatologist will assess your skin and evaluate if dermabrasion is appropriate for your specific concerns. They will explain the procedure, discuss any potential risks or side effects, and provide personalized recommendations based on your skin type and concerns. It is important to ask any questions or raise any concerns you may have during the consultation to ensure you are well-informed.
9.2 Understanding the procedure and its benefits
Dermabrasion is a procedure that involves using a device with a rotating abrasive instrument to remove the outermost layers of the skin. This mechanical exfoliation helps to improve the appearance of fine lines, wrinkles, acne scars, uneven skin texture, and sun-damaged skin. It can also stimulate collagen production, resulting in smoother, rejuvenated skin.
The procedure itself usually takes about 30 minutes to an hour, depending on the size of the area being treated. Your dermatologist will apply a numbing agent to minimize discomfort, and then use the dermabrasion device to carefully exfoliate the skin. After the procedure, your skin will be red, swollen, and sensitive, but these effects will gradually subside over time.
9.3 Preparing for the dermabrasion treatment
Before undergoing dermabrasion, your dermatologist will provide you with specific instructions on how to prepare for the treatment. It is important to follow these instructions closely to ensure the best possible results and minimize the risk of complications.
Common preparations for dermabrasion may include avoiding sun exposure, discontinuing certain skincare products or medications, and informing your dermatologist about any existing skin conditions or allergies. Your dermatologist may also prescribe specific skincare products or medications to use before the treatment to optimize the healing process. Be sure to communicate any concerns or questions with your dermatologist during the preparation phase.
9.4 Following the aftercare instructions
After undergoing dermabrasion, it is crucial to follow the aftercare instructions provided by your dermatologist to promote healing and protect your skin. Dermabrasion temporarily removes the outer layers of the skin, leaving it vulnerable to infection, sunburn, and other complications, so proper aftercare is essential.
Common aftercare instructions may include keeping the treated area clean and moisturized, avoiding sun exposure, using gentle cleansers, and applying prescribed ointments or creams. It is important to be gentle with your skin during the healing process and avoid any harsh skincare products or treatments. Follow-up appointments with your dermatologist may be necessary to monitor your progress and address any concerns or complications that may arise.
Maintaining a Healthy Skincare Routine
10.1 Cleansing the face daily
A healthy skincare routine starts with proper cleansing. Cleansing helps to remove dirt, oil, makeup, and other impurities that can clog pores and contribute to skin concerns. It is essential to cleanse your face daily to maintain a clean and healthy complexion.
When choosing a cleanser, opt for a gentle formula that suits your skin type. Avoid harsh cleansers that can strip away the skin’s natural oils and disrupt its balance. Wet your face with lukewarm water, apply a small amount of cleanser, and massage it onto your skin using gentle, circular motions. Rinse thoroughly with water and pat your face dry with a clean towel. Cleansing should be done morning and night as part of your skincare routine.
10.2 Exfoliating regularly
Regular exfoliation is crucial for removing dead skin cells, promoting skin cell turnover, and maintaining a radiant complexion. Incorporate exfoliation into your skincare routine to slough away dull skin and reveal a fresh, glowing surface.
Choose an exfoliation method that suits your skin type and concerns, such as a scrub, brush, or chemical exfoliant. Follow the specific instructions for the chosen method and be mindful not to over-exfoliate, as this can damage the skin. Exfoliation should be done once or twice a week, depending on your skin’s sensitivity and tolerance.
10.3 Moisturizing both morning and night
Moisturizing is an essential step in any skincare routine, regardless of your skin type. Moisturizers help to replenish hydration, lock in moisture, and create a protective barrier on the skin’s surface. It is important to moisturize both in the morning and at night to keep your skin balanced and nourished.
Choose a moisturizer that suits your skin type and includes ingredients that address your specific concerns. Apply a small amount to your fingertips and gently massage it onto your face using upward, circular motions. Pay extra attention to dry areas or areas that need extra hydration. Allow the moisturizer to fully absorb into your skin before applying any other products or makeup.
10.4 Protecting the skin from sun damage
Protecting your skin from sun damage is crucial for maintaining its health and preventing premature aging. Harmful ultraviolet (UV) rays can cause sunburn, wrinkles, age spots, and even increase the risk of skin cancer. Incorporate sun protection into your skincare routine to shield your skin from these damaging effects.
Choose a broad-spectrum sunscreen with a minimum SPF of 30 and apply it generously to all exposed areas of your skin, including your face, neck, and hands. Reapply sunscreen every two hours, or more frequently if you are swimming or sweating. Additionally, consider wearing protective clothing, such as hats and sunglasses, and seek shade during peak sun hours. Protecting your skin from the sun should be a year-round practice, regardless of the weather or season.
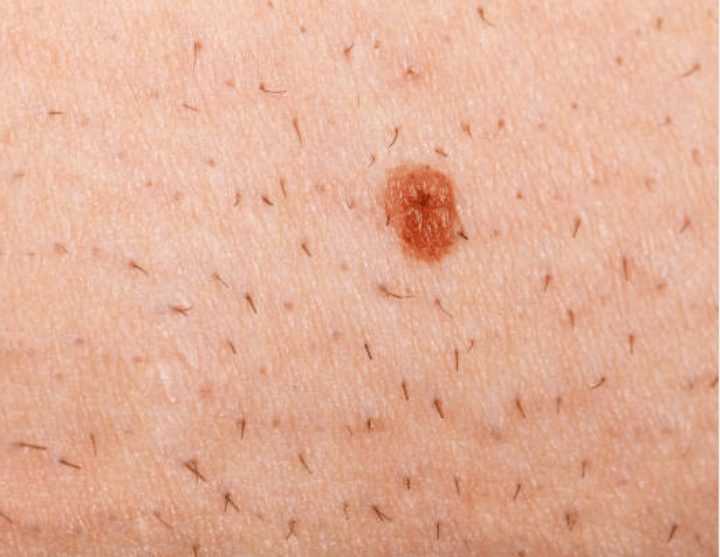
Skin Darkening After Microneedling
According to a RealSelf article, skin darkening after microneedling is a common side effect in people with darker skin tones. This is because the micro-injuries caused by the needles can trigger an overproduction of melanin, the pigment that gives color to the skin. The excess melanin can cause the skin to appear darker than usual, and in some cases, even patchy.
The skin darkening after microneedling is usually temporary and will fade over time. However, the duration of the discoloration can vary depending on the severity of the reaction and the individual’s skin type. In some cases, it may take several weeks or even months for the skin to return to its normal color.
If you do experience skin darkening after microneedling, there are several things you can do to help reduce the discoloration. These may include using skin-lightening products containing ingredients like hydroquinone or kojic acid, undergoing chemical peels or laser treatments, or simply waiting for the skin to heal naturally.
>> Read more: Is palm oil bad for your skin
How to Treat Breakouts After Microneedling
If you’re experiencing breakouts after microneedling, don’t panic. It’s a common side effect, and there are several things you can do to treat and prevent them.
Keep Your Skin Clean
The first step in treating breakouts after microneedling is to keep your skin clean. Use a gentle cleanser to remove dirt, oil, and makeup from your skin, but avoid using harsh scrubs or exfoliants that can irritate your skin and make the breakouts worse.
Avoid Heavy Moisturizers and Makeup
After microneedling, your skin may be more sensitive and prone to breakouts. To prevent further irritation, avoid using heavy moisturizers and makeup that can clog your pores and cause more breakouts.
Instead, opt for lightweight, oil-free moisturizers and makeup that won’t clog your pores and will allow your skin to breathe.
Use a Topical Acne Treatment
If you’re experiencing breakouts after microneedling, consider using a topical acne treatment to help clear up your skin. Look for products that contain salicylic acid or benzoyl peroxide, which can help unclog your pores and reduce inflammation.
Be Patient
Breakouts after microneedling are a common side effect, but they usually clear up on their own within a few days to a week. In the meantime, follow these tips to help treat and prevent further breakouts, and be sure to discuss any concerns with your skincare provider.
Peeling 2 Weeks After Microneedling
One of the side effects of microneedling is skin peeling
How Long Does Peeling Last After Microneedling?
Peeling after microneedling is a normal part of the healing process. It usually starts a few days after the treatment and can last for up to two weeks. The duration of peeling can vary depending on the depth of the microneedling treatment and the individual’s skin type.
During the first few days after microneedling, the skin may appear red and feel sensitive. This is because the skin is still healing and the body is working to repair the damaged tissue. As the skin heals, it may start to peel and flake off. This is a sign that the body is shedding the old, damaged skin and replacing it with new, healthy skin.
How to Treat Permanent Redness After Microneedling
Some people may experience permanent redness after microneedling. This can be caused by several factors, including skin sensitivity, improper aftercare, and using a device with needles that are too long.
If you experience permanent redness after microneedling, there are several things you can do to treat it:
- Avoid sun exposure: Sun exposure can exacerbate redness and irritation, so it’s important to avoid direct sunlight and wear sunscreen with an SPF of at least 30.
- Use a gentle cleanser: Use a gentle cleanser to wash your face twice a day. Avoid using harsh scrubs or exfoliants, as these can further irritate the skin.
- Apply a soothing cream: Apply a cream or serum that contains ingredients like aloe vera or chamomile, which can help soothe and calm irritated skin.
- Consider laser therapy: In some cases, laser therapy may be necessary to reduce redness and improve the appearance of the skin. Talk to a dermatologist or aesthetician to see if this is a good option for you.
Face Burning After Microneedling
Face burning can be a common side effect, especially if the procedure was performed aggressively or if the skin is sensitive. The burning sensation may feel like a mild sunburn and can last for a few hours to a few days.

To alleviate the burning sensation, it is recommended to apply a cool compress to the affected area. Aloe vera gel or a gentle moisturizer can also help soothe the skin and reduce inflammation. It is important to avoid using any harsh products or exfoliants on the skin until it has fully healed.
In some cases, face burning can be a sign of an infection or allergic reaction. If the burning sensation is accompanied by redness, swelling, or pus, seek medical attention immediately. An experienced dermatologist can assess the situation and provide appropriate treatment.
>> Read more: Agnes skin treatment
What Should I Put On My Face After Microneedling?
One of the most important steps in microneedling aftercare is applying the right products to your skin. Immediately after microneedling, the skin’s protective barrier is compromised, leaving it vulnerable to irritation, inflammation, and infection. Therefore, it’s crucial to use products that will help reseal the skin, calm inflammation, and provide moisture and nutrients to combat signs of aging.
The most important product to apply after microneedling is hyaluronic acid. This ingredient is a natural humectant that helps the skin retain moisture, which is crucial for the healing process. Hyaluronic acid also has anti-inflammatory properties that can help soothe redness, swelling, and irritation. It’s best to use a pure hyaluronic acid serum without any other active ingredients immediately after microneedling.
After the first 24 hours, you can start using other products that will help promote healing and nourish the skin. Some of the best products to use after microneedling include:
- Peptides: These amino acid chains help stimulate collagen production, which is essential for maintaining firm, youthful-looking skin. Peptides also have anti-inflammatory and antioxidant properties that can help protect the skin from damage and promote healing.
- Vitamin C: This potent antioxidant can help brighten the skin, fade dark spots, and protect against environmental stressors. Vitamin C also helps stimulate collagen production and can improve the overall texture and tone of the skin.
- Retinol: This vitamin A derivative is a powerful anti-aging ingredient that can help reduce the appearance of fine lines, wrinkles, and sun damage. However, it’s essential to wait at least a week after microneedling before using retinol to avoid irritation.
Can I Wash My Face After Microneedling?
Most skincare professionals recommend that you only use water (no soap, face wash, or cleanser) for the first 48 hours after microneedling. This is because your skin is more sensitive and vulnerable to irritation during this time. Using soap or other products can cause irritation or even infection, which can slow down the healing process and potentially cause scarring.
After the first 48 hours, you can start to use a gentle cleanser to wash your face. Choose a mild, fragrance-free cleanser that will not irritate your skin. Some dermatologists recommend using a cleanser that contains ceramides, which can help to restore the skin barrier and reduce inflammation.
When washing your face, be gentle and avoid rubbing or scrubbing your skin. Use lukewarm water and a soft cloth or your fingertips to gently cleanse your skin. Pat your skin dry with a clean towel, and avoid rubbing or pulling on your skin.
When to Wash Face After Microneedling
One of the most common questions people have is when they can wash their face after the procedure.
It is recommended to wait at least 6-8 hours before washing your face. This will give the skin enough time to heal and calm down after the procedure. Washing your face too soon can cause irritation and inflammation, which can lead to more serious complications.
When you wash your face, use a gentle cleanser that does not contain any harsh chemicals or fragrances. You should also avoid using any exfoliating products or scrubs for at least a week after the procedure.
How To Remove Dead Skin After Microneedling Conclusion
In conclusion, how to remove dead skin after microneedling? Maintaining a healthy skincare routine involves various steps and techniques to exfoliate, moisturize, massage, and protect your skin. By incorporating these practices into your daily routine, you can achieve a glowing complexion and improve the overall health of your skin. Remember to consult with a dermatologist for personalized advice, as they can guide you in choosing the most suitable treatments and products for your skin type and concerns.